> For the complete documentation index, see [llms.txt](https://docs.elkyc.com/home/llms.txt). Markdown versions of documentation pages are available by appending `.md` to page URLs; this page is available as [Markdown](https://docs.elkyc.com/home/get-started/application.md).
# Application
The Applications page is where you configure key settings and credentials needed to interact with our Public API and Webhooks. This guide will walk you through creating and managing applications:
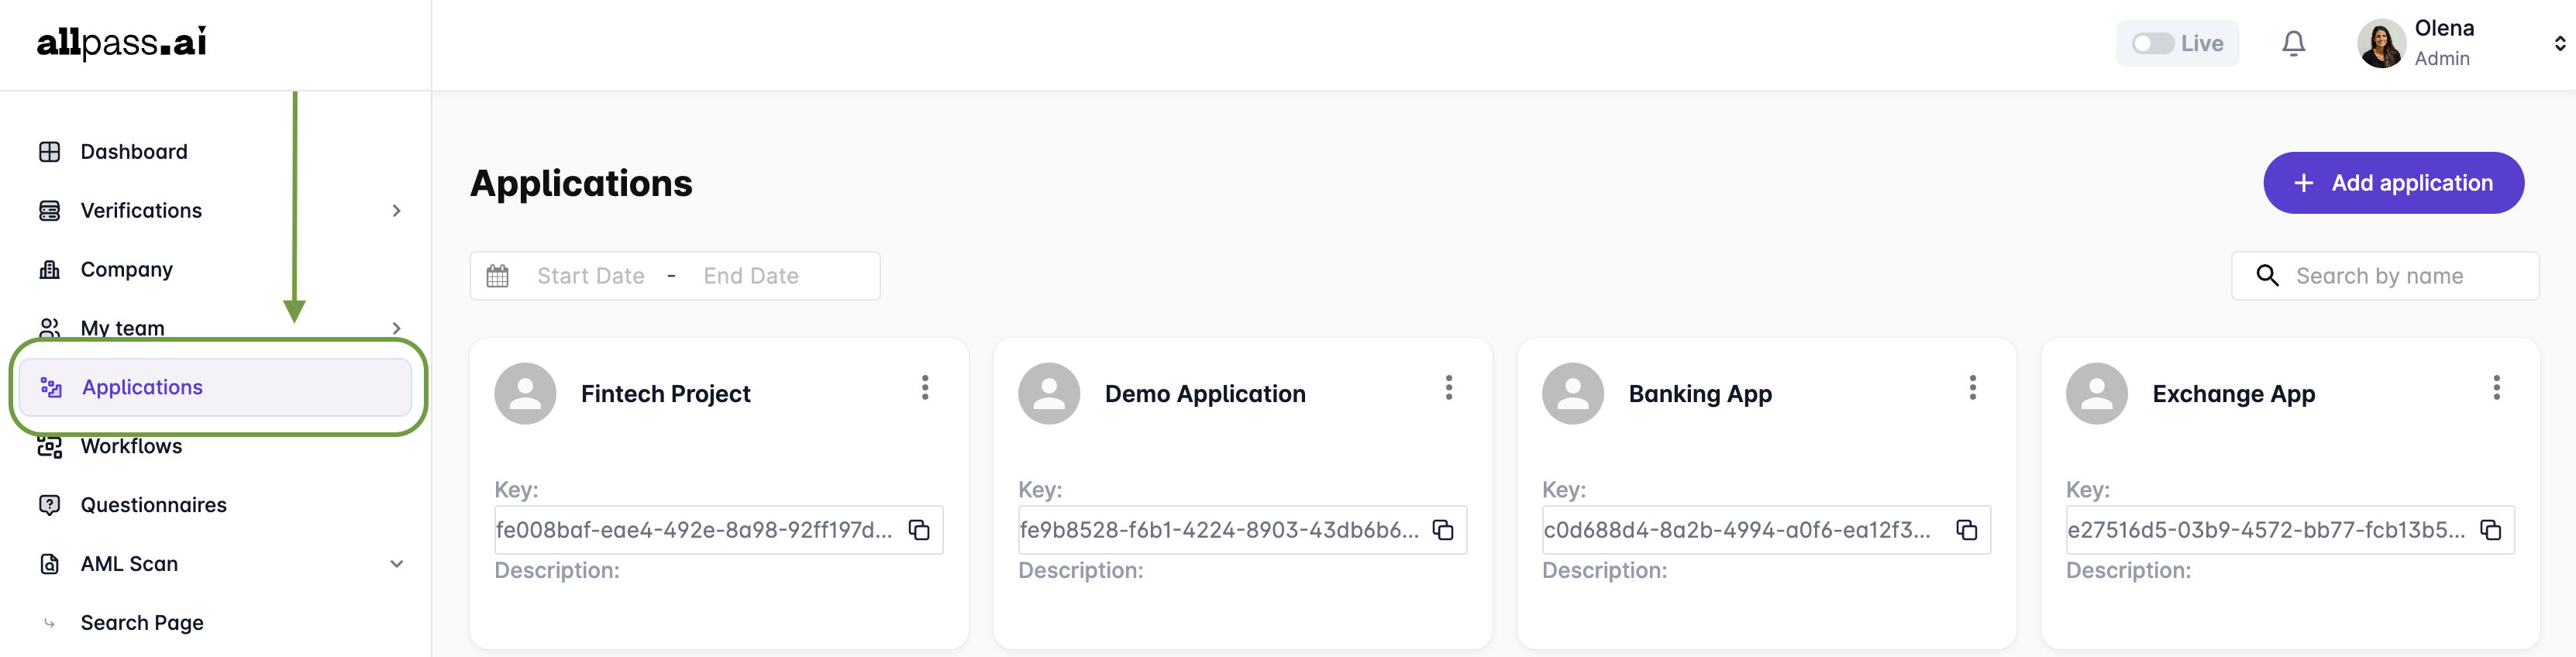
* You can create new and manage existing applications through the `Applications` section in Workplace:
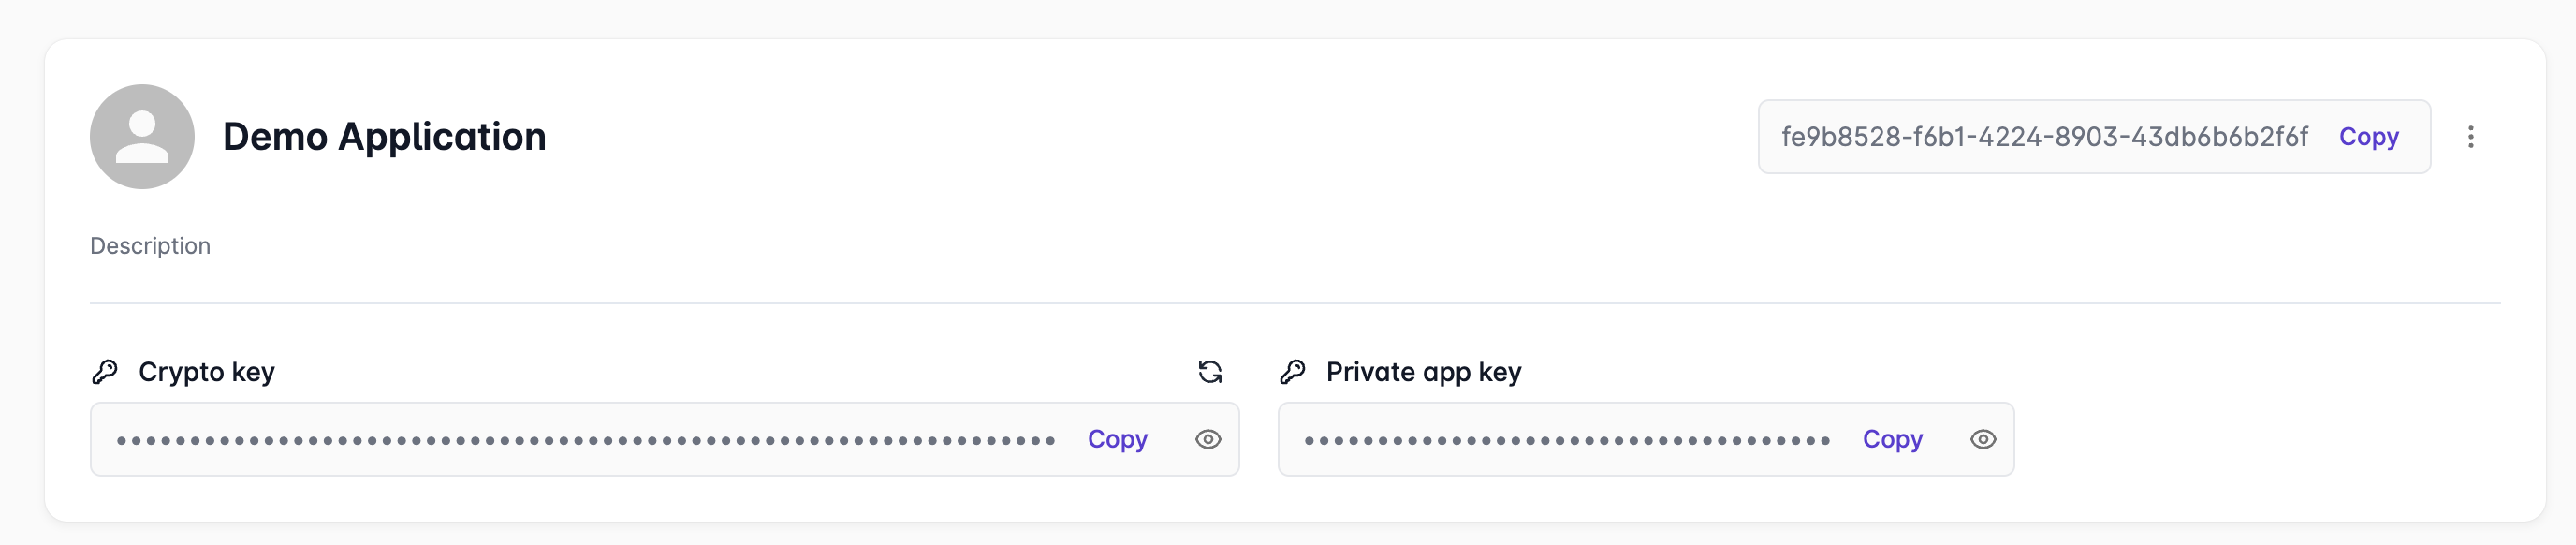
* As soon as your application is created you can open it anytime and get the details required for further integration.
### Application Configuration Overview
Each application contains essential parameters for API authentication, webhook integration, and user redirection:
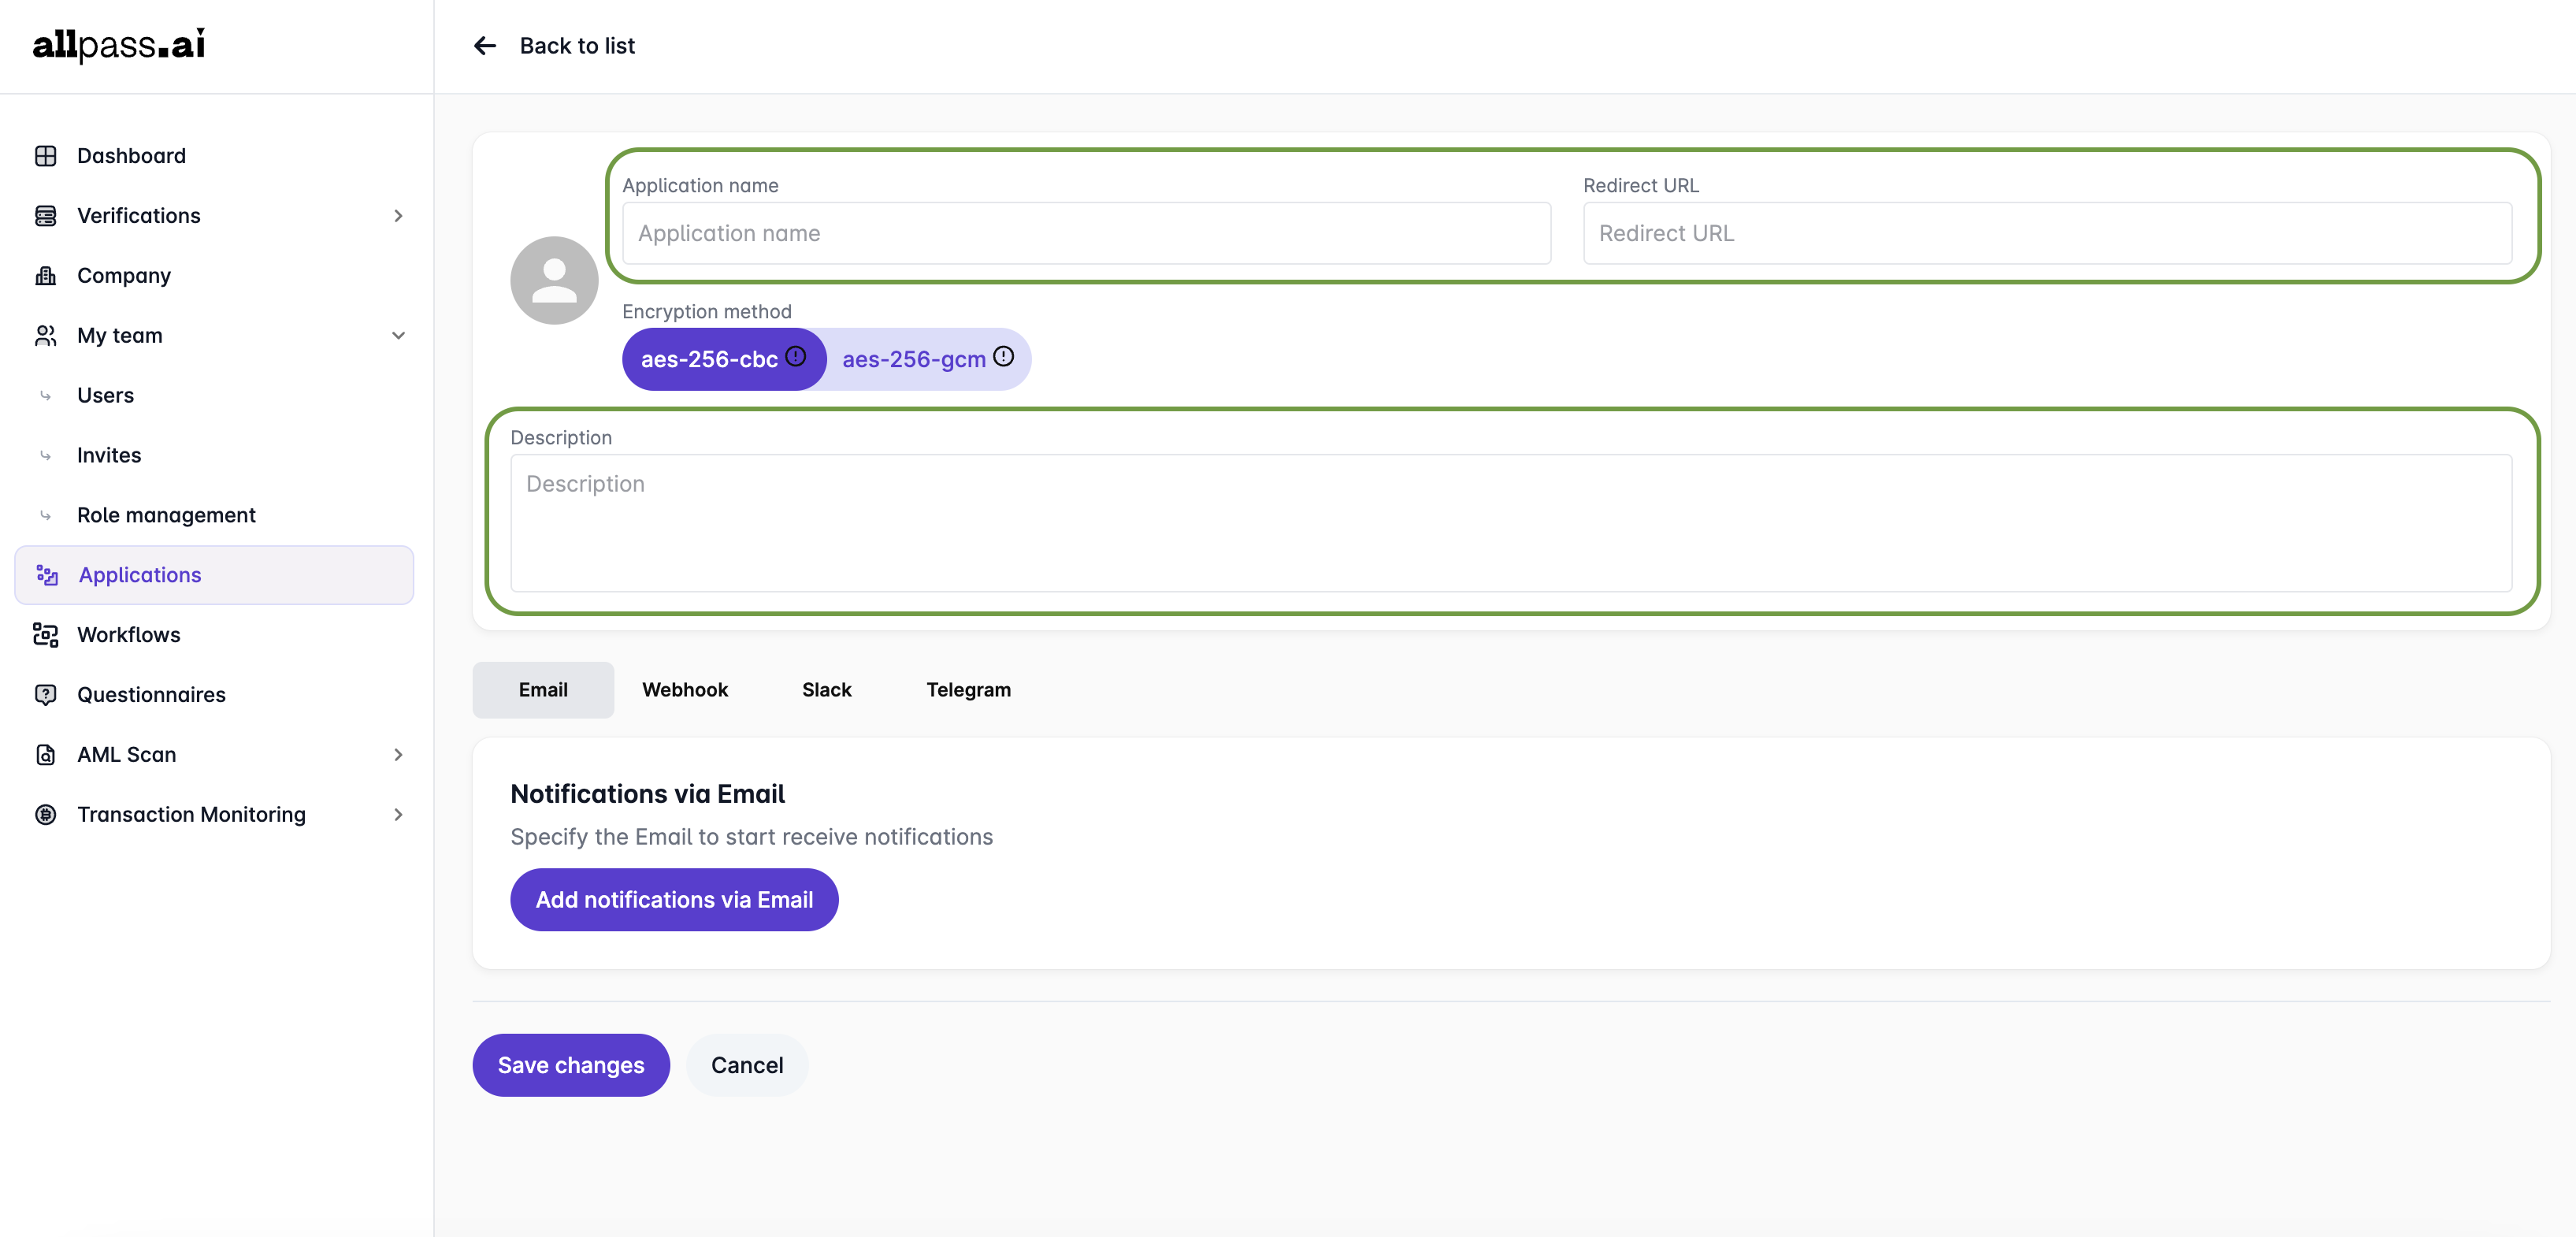
#### **Application Name (Required)**
* **Purpose:** The unique name used to identify your application.
* **Usage:** This field is **mandatory** and must be filled in when creating an application. Choose a name that clearly represents your application’s purpose.
#### **Description (Optional)**
* **Purpose:** Provides additional context about the application.
* **Usage:** This field is optional but can be used to store notes or details about the application's purpose, functionality, or integration details.
#### **Redirect URL**
* **Purpose:** Specifies the URL where users will be redirected after completing the applicant flow.
* **Usage:** This should point to a page in your application where users continue their process after verification.
**How to Set the Redirect URL**
1. In the **Application Details** section, locate the **Redirect URL** field.
2. Enter the **URL** where applicants should be redirected after verification (e.g., `https://www.yourapp.com/success`).
3. Click `Save changes` to confirm.
#### Encryption Method
* **Purpose:** Specifies the encryption algorithm used to protect sensitive data associated with a particular application.
* **Usage:** Choose between **AES-256-CBC** and **AES-256-GCM** based on your security and performance needs. This setting helps ensure compliance with security standards and allows you to align encryption preferences with internal policies or partner requirements.\
\- **AES-256-CBC** – A widely adopted and secure encryption standard, suitable for most use cases.\
\- **AES-256-GCM** – Offers improved performance and built-in authentication, recommended when additional integrity protection is needed.
### Application ID, Crypto Key, and Private App Key
After the application is **created and saved**, the system generates the following **unique keys**:
#### **Application ID**
* **Purpose:** A unique identifier for your application.
* **Usage:** This ID is used internally within the system to reference your application during API interactions.
#### **Crypto Key**
* **Purpose:** Used for encrypting and decrypting data exchanged between your application and our services.
* **Usage:** Retrieve this key to securely transmit sensitive data.
{% hint style="info" %}
You can regenerate the Crypto Key if needed, but this will invalidate the previous key.
{% endhint %}
#### **Private App Key**
* **Purpose:** Required for authentication when interacting with the **Public API**.
* **Usage:** Include this key in API requests to ensure secure and authorized access.
{% hint style="info" %}
These keys are generated only after the application is created and saved.
For security reasons, store these keys securely, as they provide access to API functionalities.
{% endhint %}
### Webhook Integration
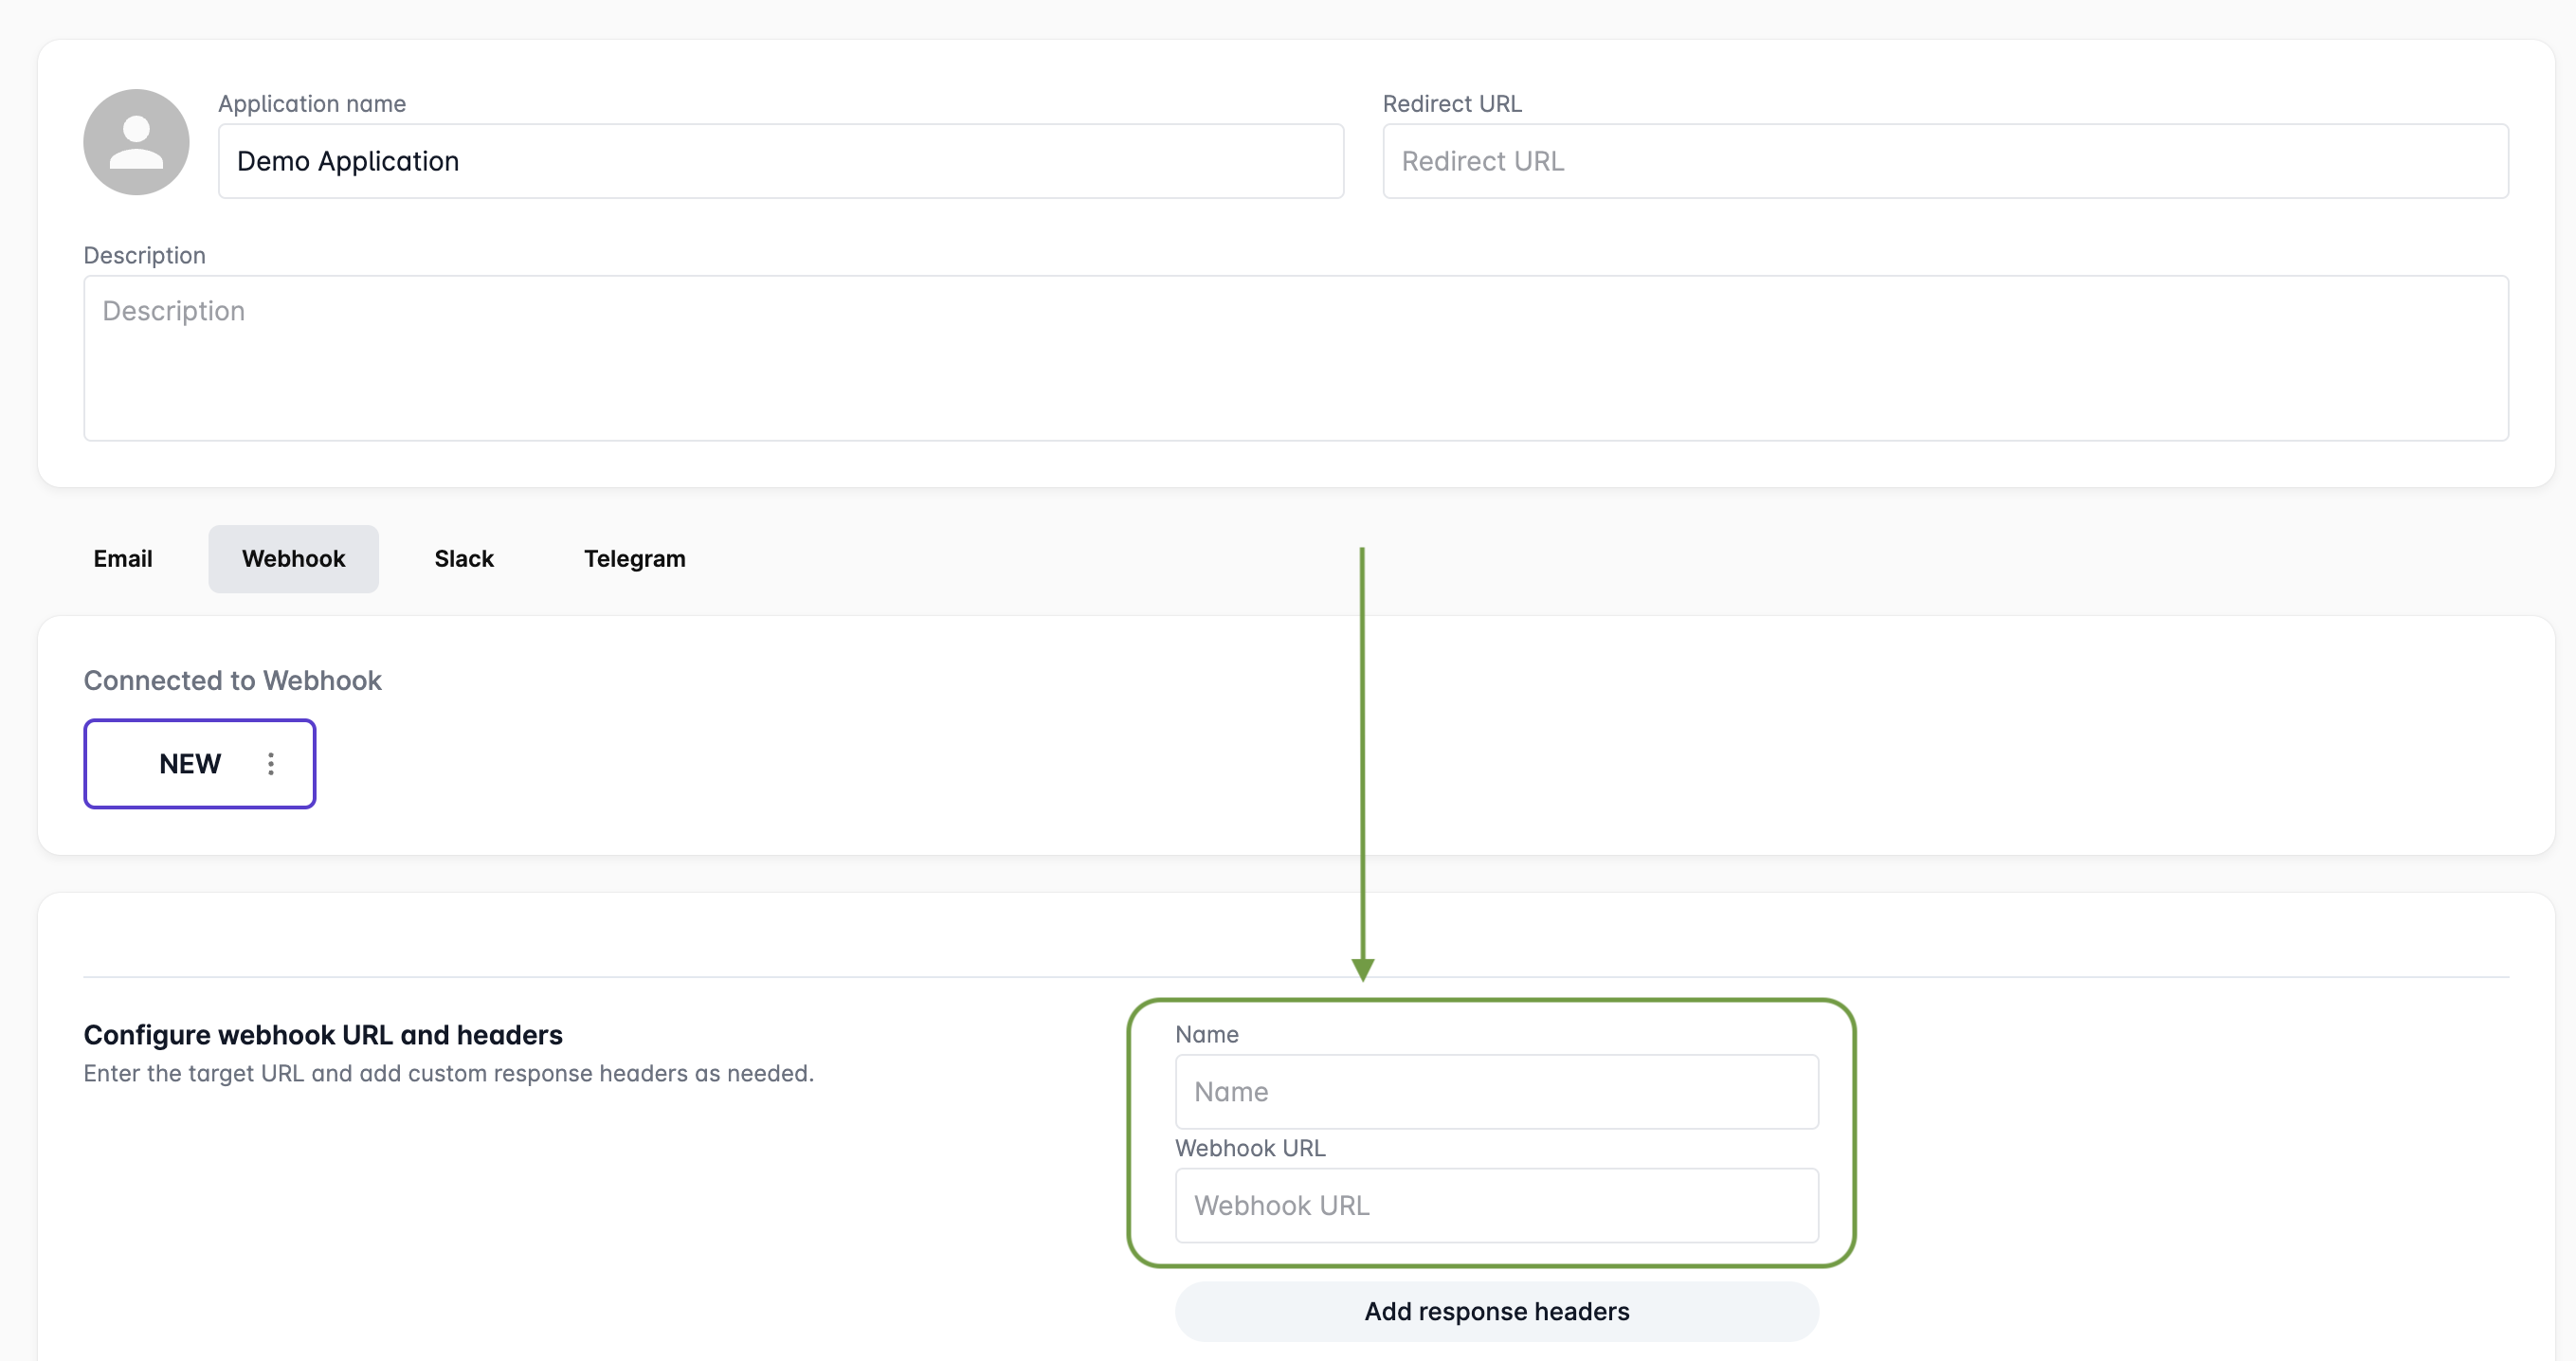
The **Webhook** tab allows you to set up notifications and event tracking for your application.
#### **Webhook Endpoint**
* **Purpose:** Defines a Webhook URL where our system will send real-time event notifications about applicant status and other updates.
* **Usage:** Provide a URL that can handle requests from our system. These notifications help automate workflows and keep your application up-to-date.
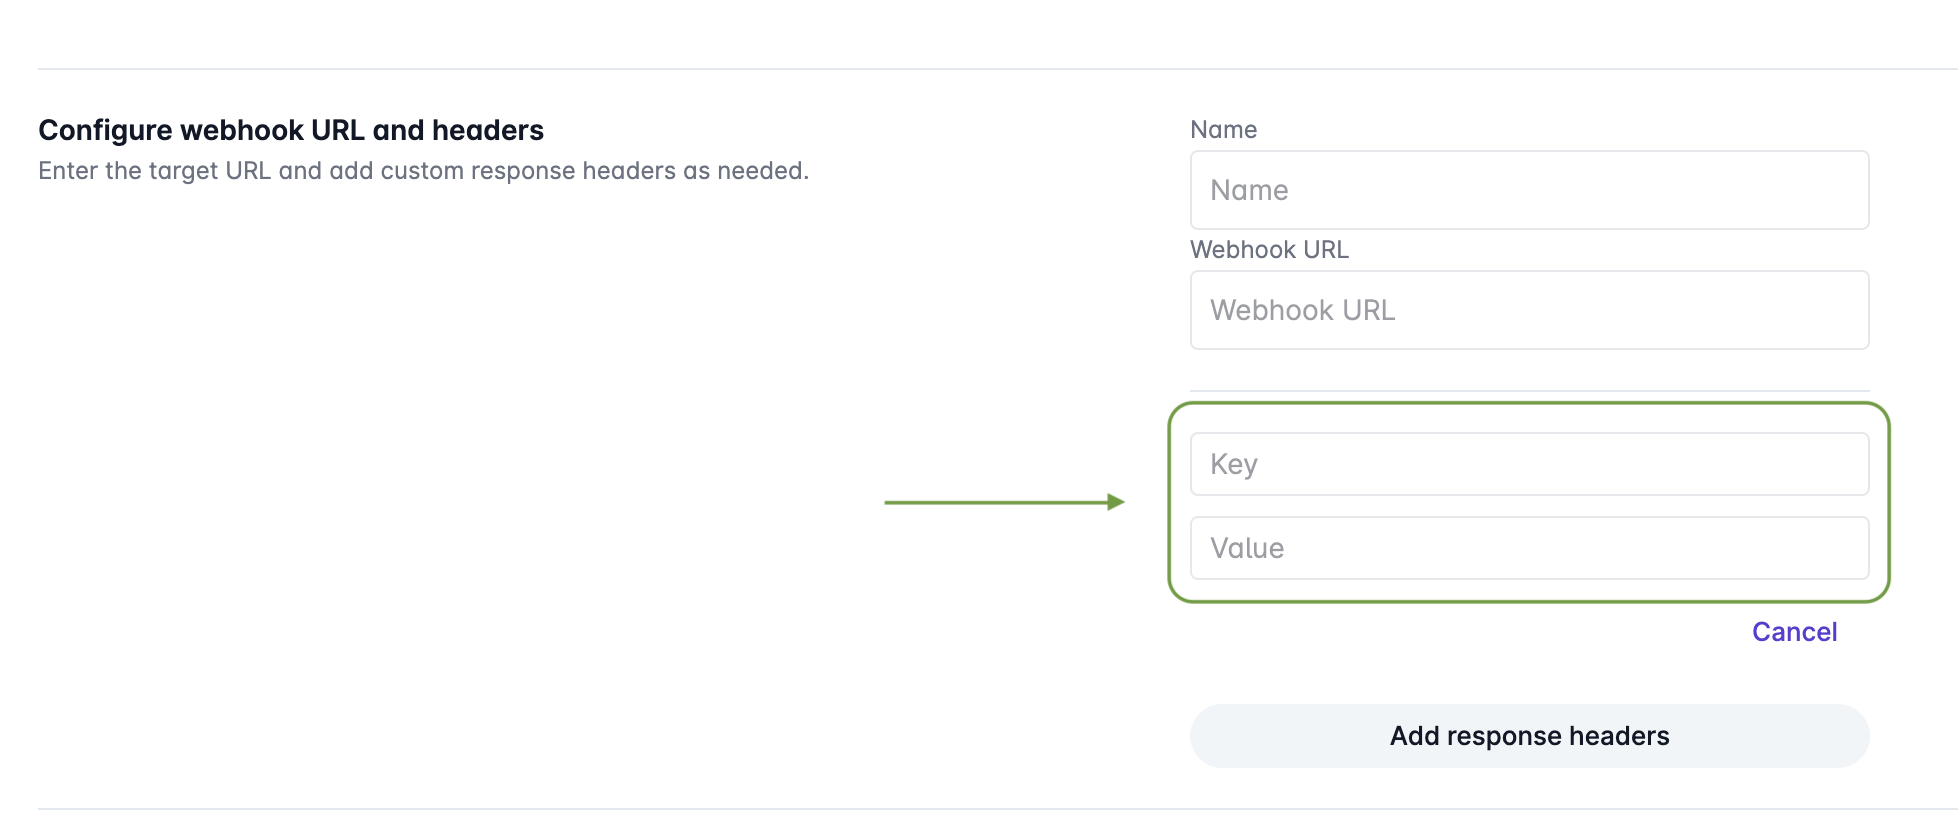
#### **Response Headers**
* **Purpose:** Add custom response headers to ensure secure and authenticated communication between your application and the webhook receiver.
* **Usage:** Multiple headers can be added to support security and other necessary configurations.
**How to Configure Webhooks**
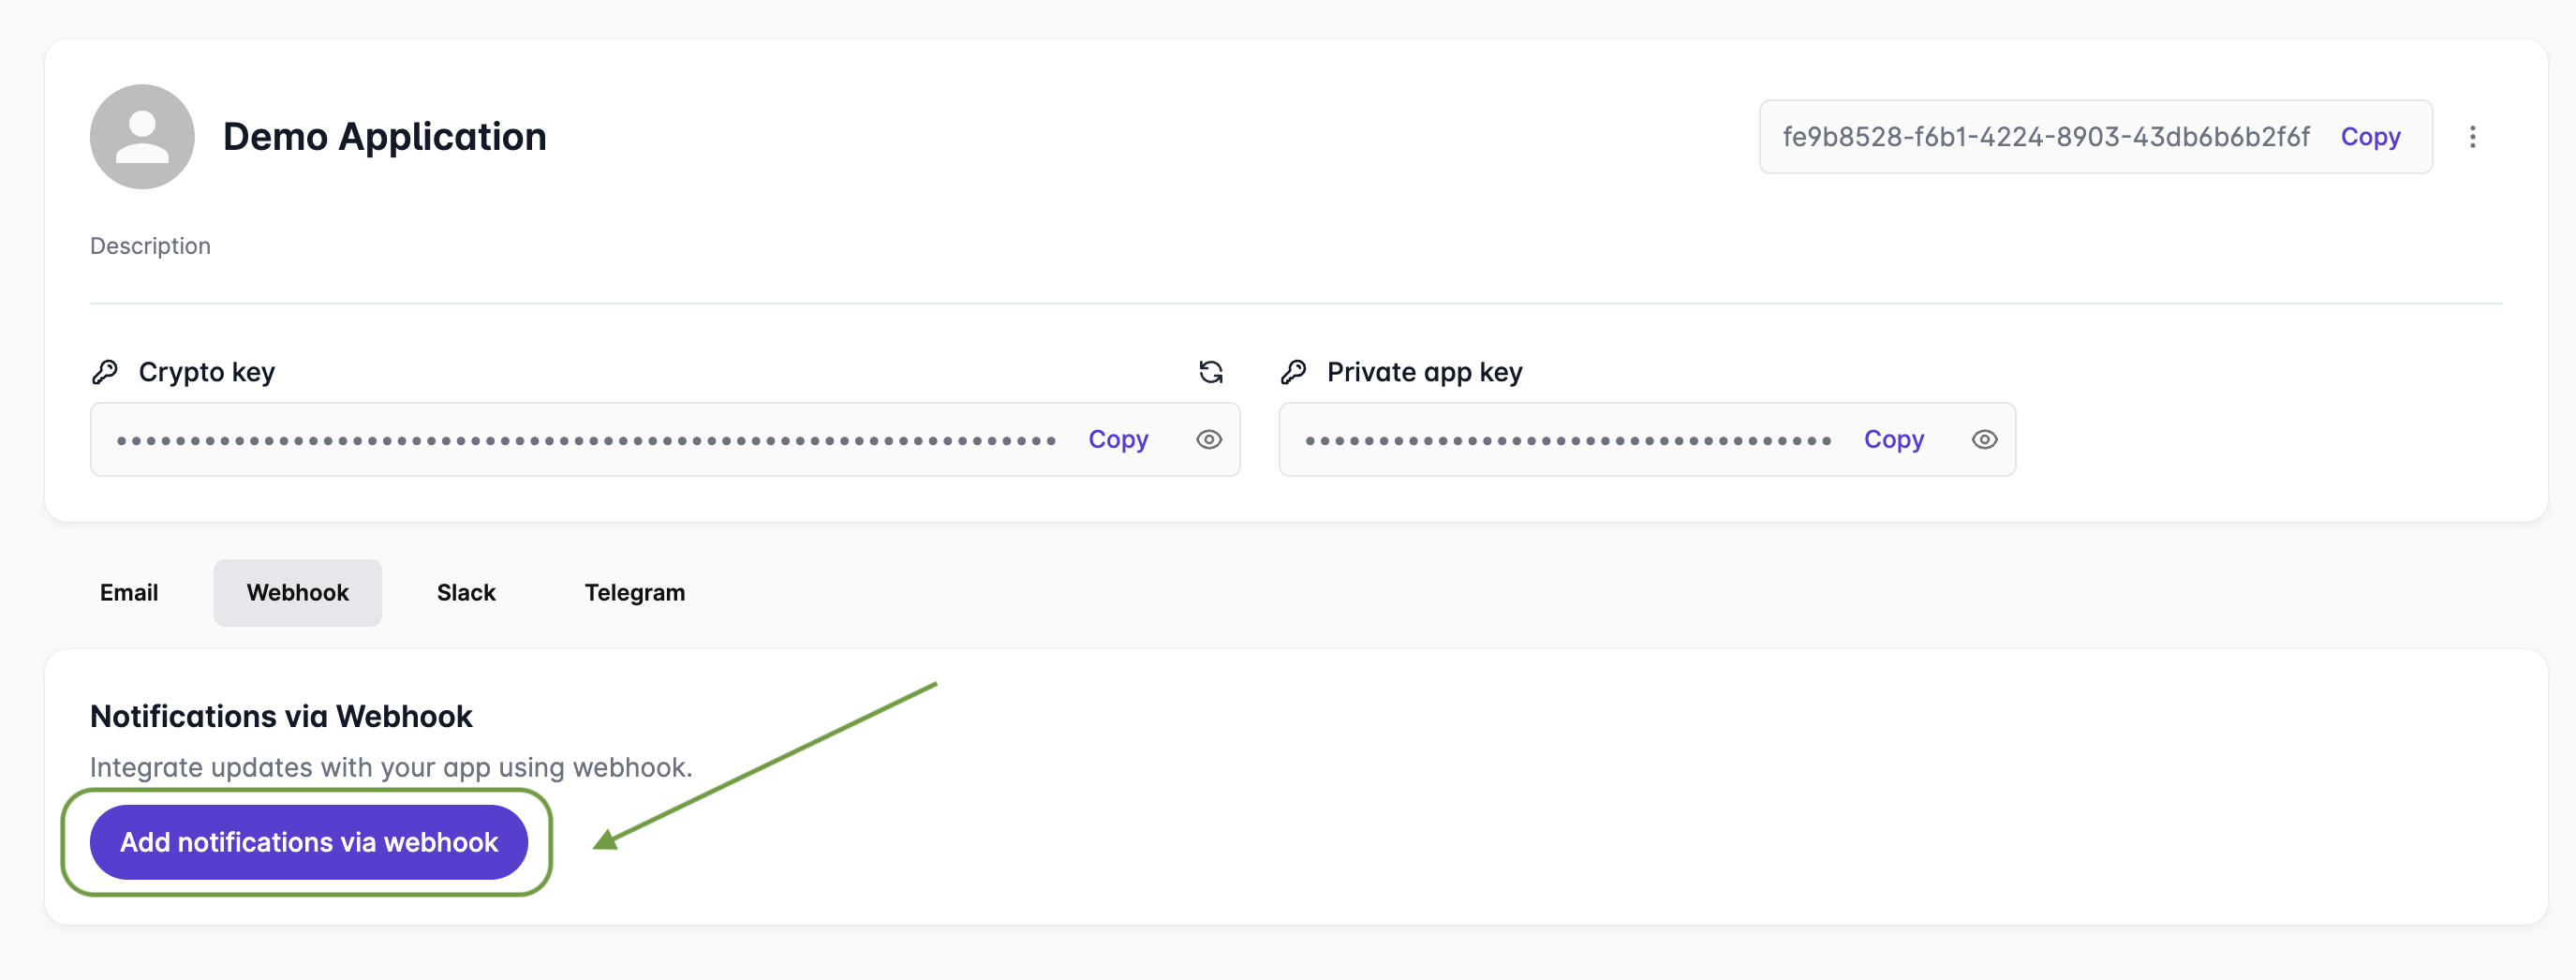
1. Navigate to the **Webhook** tab in the **Application Settings**.
2. Click `Add notifications via webhook` to create a new webhook connection.
3. Enter a **Webhook Name** and **Webhook URL**
4. To add custom headers:
* Click `Add response headers`
* Enter a **Key** and **Value** pair (e.g., `Authorization: Bearer `).
* Repeat this step to add multiple response headers if needed.
5. Click `Save changes` to apply the configuration.
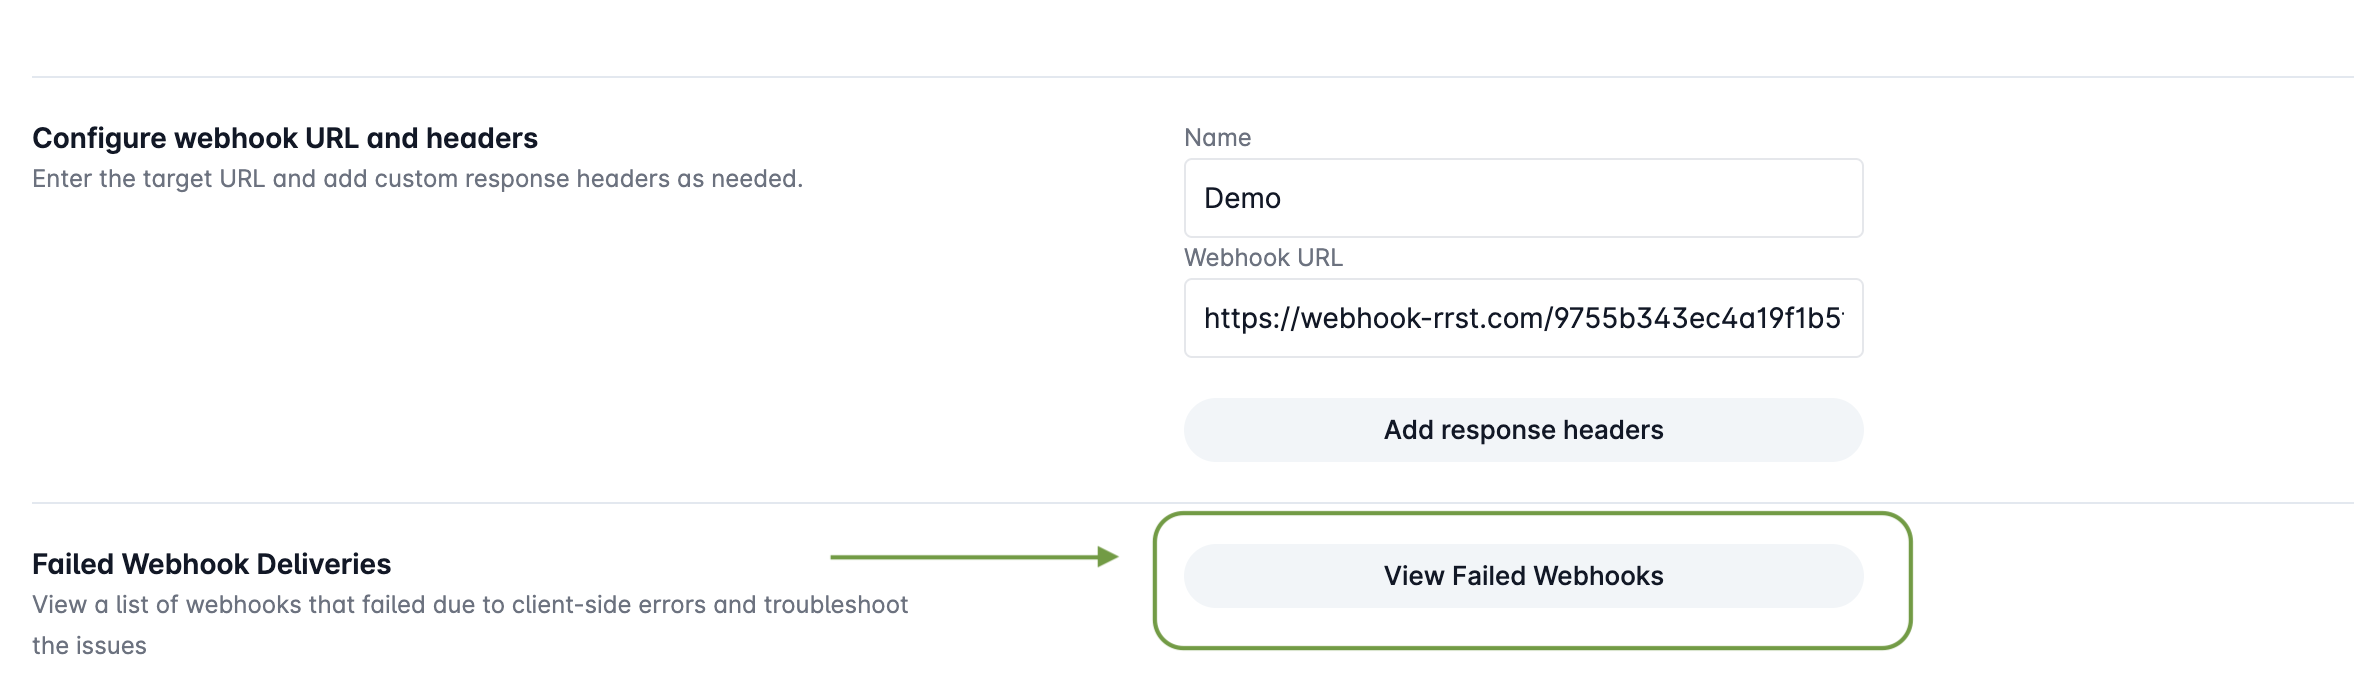
### Failed Webhook Deliveries
The **Failed Webhook Deliveries** section provides insights into webhook events that failed due to issues on the client side. This feature helps users identify errors and troubleshoot their webhook configurations.
#### **How to View Failed Webhook Deliveries**
1. Navigate to the **Webhook** tab in the **Application Settings**.
2. Scroll down to the **Failed Webhook Deliveries** section.
3. Click `View Failed Webhooks` to open the failure log.
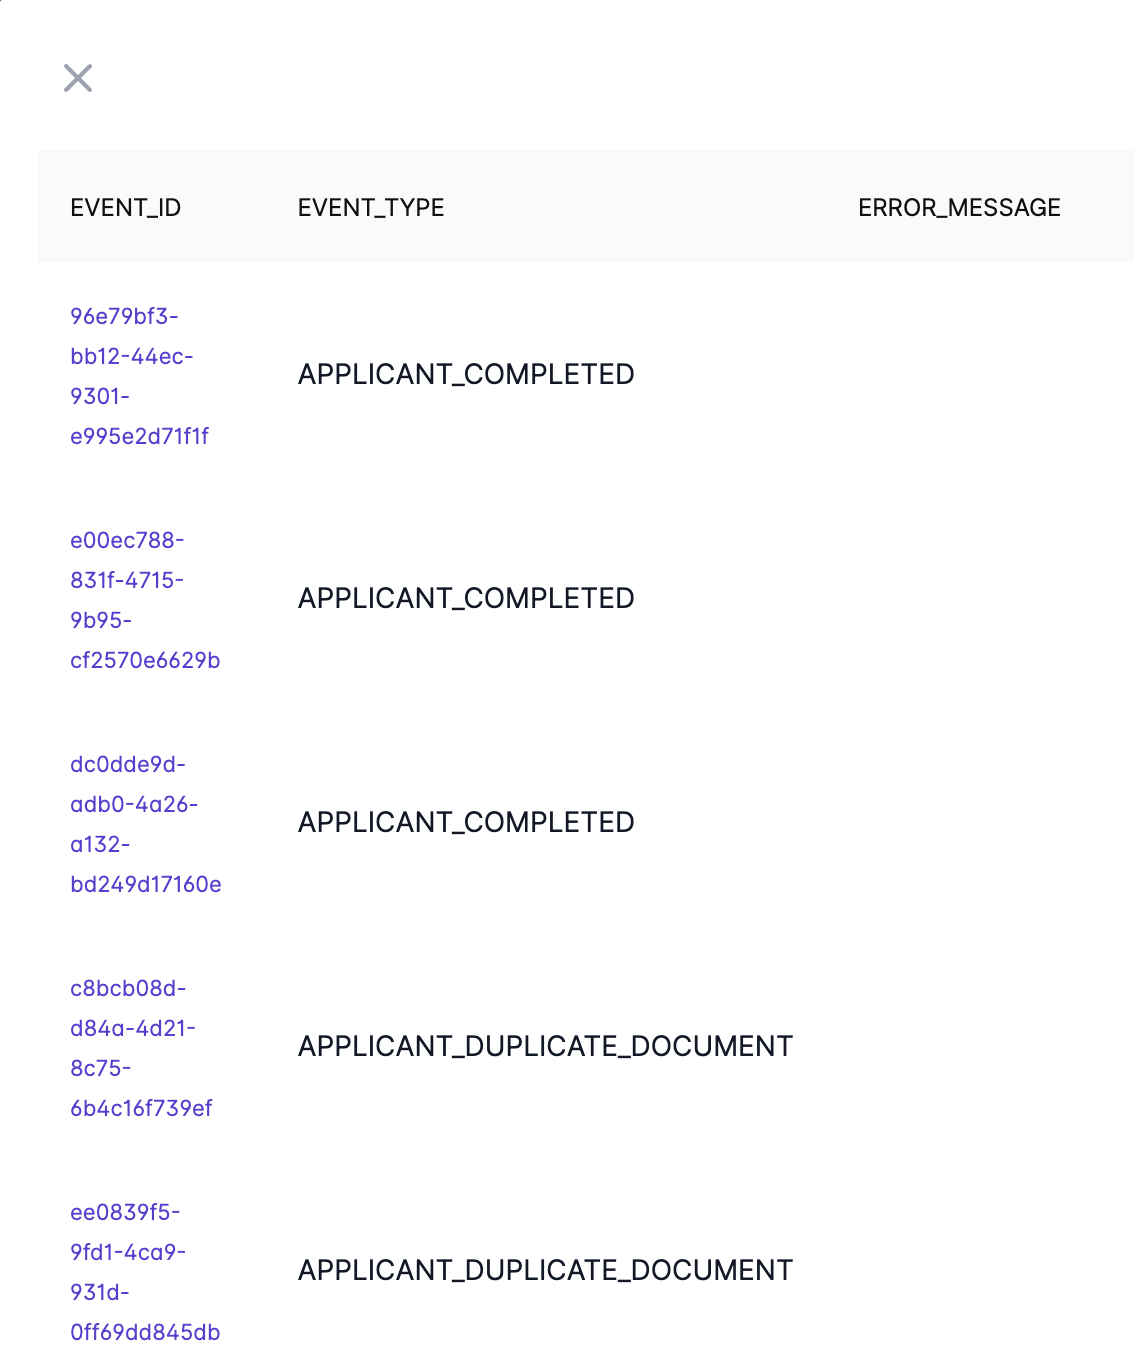
4. The failure log displays:
* **EVENT\_ID** – A unique identifier for each failed event.
* **EVENT\_TYPE** – The type of webhook event (e.g., `APPLICANT_COMPLETED`, `APPLICANT_DUPLICATE_DOCUMENT`).
* **ERROR\_MESSAGE** – A description of why the webhook request failed (e.g., "Expired document").
***